k3s 离线部署:https://docs.k3s.io/zh/installation/airgap
kube-vip:https://kube-vip.io/docs/usage/k3s/
 1
 2
 3
 4
 5
 6
 7
 8
 9
10
11
|
# 需要使用hostnamectl set-hostname xxx对所有机器修改主机名

# 3台server
172.16.99.11 server01
172.16.99.12 server02
172.16.99.13 server03

# 3台agent
172.16.99.14 agent01
172.16.99.15 agent02
172.16.99.16 agent03
|
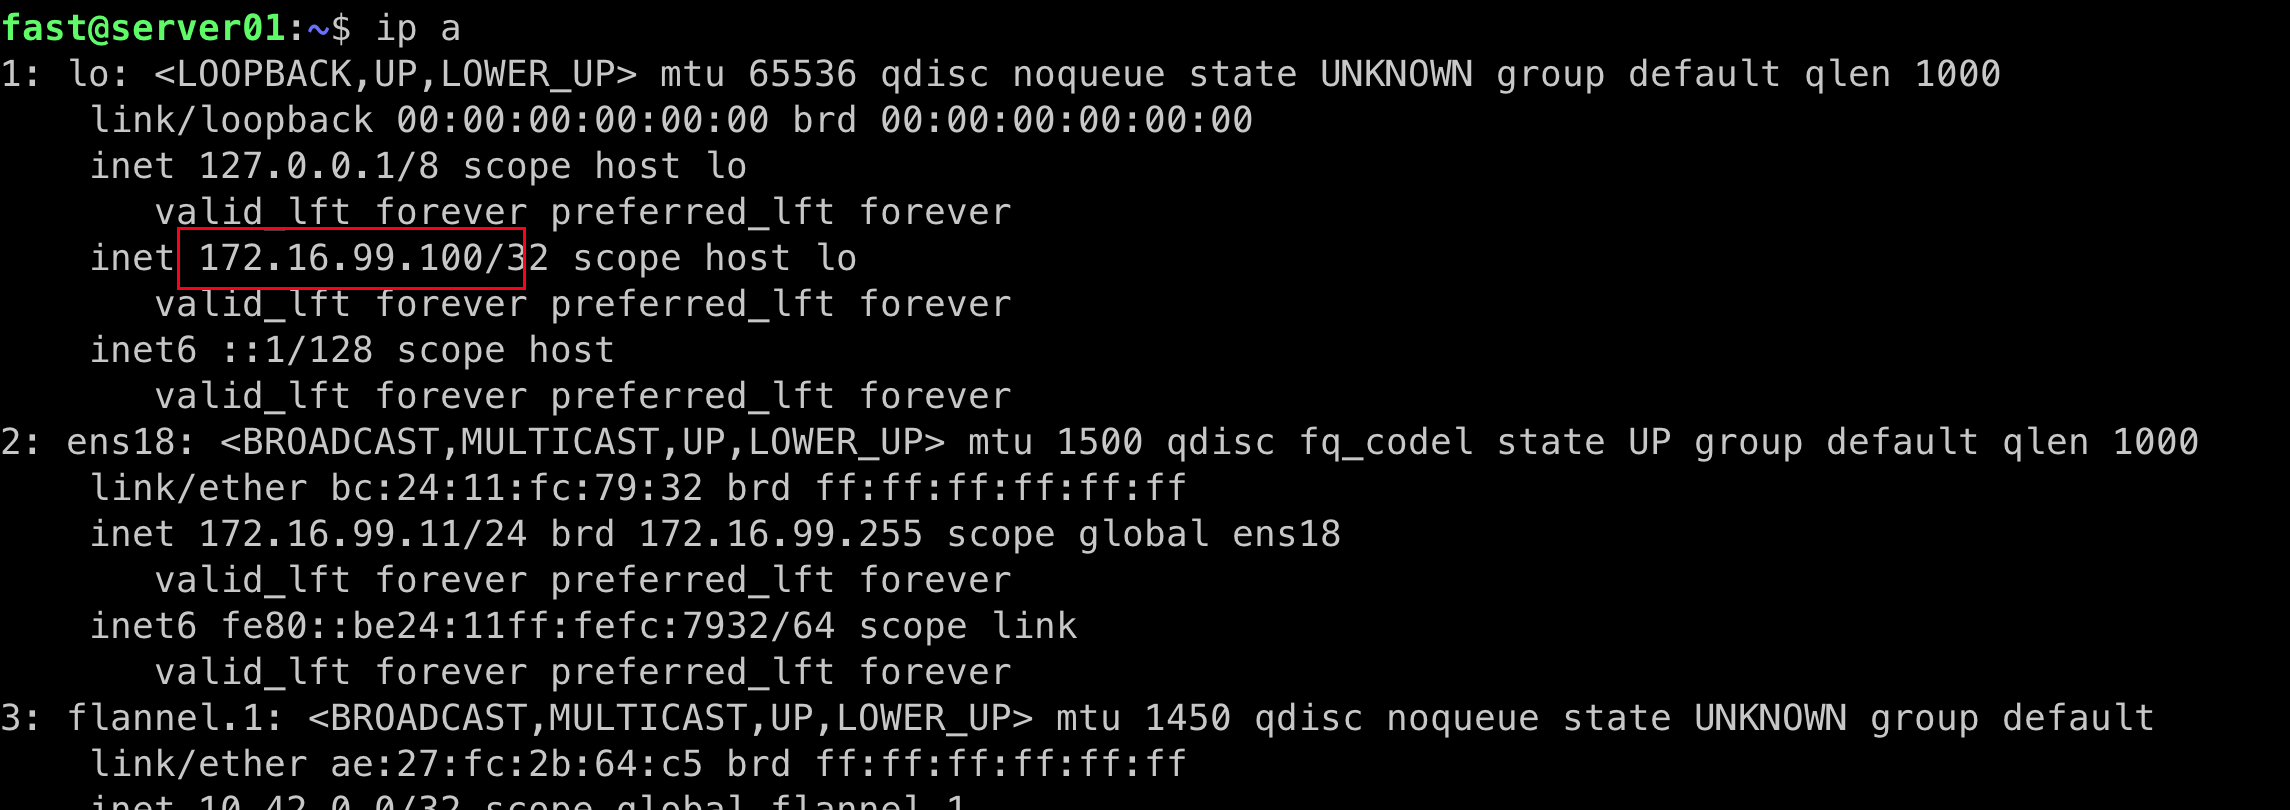
准备一个和 server 同网段且空闲的虚拟 IP 给 kube-vip,本文档以 172.16.99.100 为例。
kube-vip 是为了能用一个固定的虚拟 IP 充当负载均衡器来访问集群,提高集群的可用性
这个虚拟 IP 在初始化 server 和 agent 的时候都要用,会添加到三台 server 的 lo 接口
最终安装完后的效果

一、准备离线文件
从https://github.com/k3s-io/k3s/releases下载 k3s 镜像包和 k3s 二进制文件。
版本无所谓,选最新的就行,推荐选择 .tar.zst 的 (压缩率高)。
二、初始化所有的 agent 和 server
将下载的 k3s 二进制文件放到/usr/local/bin,并且加可执行权限 chmod +x /usr/local/bin/k3s
创建目录/var/lib/rancher/k3s/agent/images/,并将下载的镜像文件放进去(不需要解压)
将安装脚本下载下来,命令 curl -sfL https://get.k3s.io -o install.sh
三、准备 kube-vip 镜像
在本地下载 kube-vip 镜像,并传输到所有的 server 机器上。
注意修改对应的 IP 地址
1
|
INSTALL_K3S_SKIP_DOWNLOAD=true ./install.sh server --cluster-init --tls-san=172.16.99.100
|
在 server01 上执行以下命令获取 token,后续安装需要用到。
1
|
cat /var/lib/rancher/k3s/server/token
|
接下来由于后面的 server 和 agent 都需要用到虚拟 IP 来进行注册,所以需要先安装 kube-vip。
参考文档:https://kube-vip.io/docs/usage/k3s/
首先,导入 kube-vip 镜像。由于 k3s 默认使用的不是 docker,是 containerd,所以导入镜像的方式和 docker 有点区别,使用 ctr 命令。
-n k8s.io // k3s 和 k8s 指定了要使用 k8s.io 这个命名空间
--digests=true // 将导入的镜像中的 tag 信息一起导入进去
1
|
$ ctr -n k8s.io images import kube-vip.tar --digests=true
|
创建两个文件:
kube-vip-rbac.yaml
参考:https://kube-vip.io/docs/usage/k3s/
1
2
3
4
5
6
7
8
9
10
11
12
13
14
15
16
17
18
19
20
21
22
23
24
25
26
27
28
29
30
31
32
33
34
35
36
37
38
|
apiVersion: v1
kind: ServiceAccount
metadata:
name: kube-vip
namespace: kube-system
---
apiVersion: rbac.authorization.k8s.io/v1
kind: ClusterRole
metadata:
annotations:
rbac.authorization.kubernetes.io/autoupdate: "true"
name: system:kube-vip-role
rules:
- apiGroups: [""]
resources: ["services/status"]
verbs: ["update"]
- apiGroups: [""]
resources: ["services", "endpoints"]
verbs: ["list","get","watch", "update"]
- apiGroups: [""]
resources: ["nodes"]
verbs: ["list","get","watch", "update", "patch"]
- apiGroups: ["coordination.k8s.io"]
resources: ["leases"]
verbs: ["list", "get", "watch", "update", "create"]
---
kind: ClusterRoleBinding
apiVersion: rbac.authorization.k8s.io/v1
metadata:
name: system:kube-vip-binding
roleRef:
apiGroup: rbac.authorization.k8s.io
kind: ClusterRole
name: system:kube-vip-role
subjects:
- kind: ServiceAccount
name: kube-vip
namespace: kube-system
|
kube-vip.yaml
参考:https://kube-vip.io/docs/installation/daemonset/#generating-a-manifest
 1
 2
 3
 4
 5
 6
 7
 8
 9
10
11
12
13
14
15
16
17
18
19
20
21
22
23
24
25
26
27
28
29
30
31
32
33
34
35
36
37
38
39
40
41
42
43
44
45
46
47
48
49
50
51
52
53
54
55
56
57
58
59
60
61
62
63
64
65
66
67
68
69
70
71
72
73
74
75
76
77
78
79
80
81
82
83
84
85
|
apiVersion: apps/v1
kind: DaemonSet
metadata:
  labels:
    app.kubernetes.io/name: kube-vip-ds
    app.kubernetes.io/version: v0.5.0
  name: kube-vip-ds
  namespace: kube-system
spec:
  selector:
    matchLabels:
      app.kubernetes.io/name: kube-vip-ds
  template:
    metadata:
      labels:
        app.kubernetes.io/name: kube-vip-ds
        app.kubernetes.io/version: v0.5.0
    spec:
      affinity:
        nodeAffinity:
          requiredDuringSchedulingIgnoredDuringExecution:
            nodeSelectorTerms:
            - matchExpressions:
              - key: node-role.kubernetes.io/master
                operator: Exists
            - matchExpressions:
              - key: node-role.kubernetes.io/control-plane
                operator: Exists
      containers:
      - args:
        - manager
        env:
        - name: vip_arp
          value: "false"
        - name: port
          value: "6443"
        - name: vip_interface
          value: lo
        - name: vip_cidr
          value: "32"
        - name: cp_enable
          value: "true"
        - name: cp_namespace
          value: kube-system
        - name: vip_ddns
          value: "false"
        - name: svc_enable
          value: "true"
        - name: bgp_enable
          value: "true"
        - name: bgp_routerinterface
          value: "ens18"
        - name: bgp_routerid
          valueFrom:
            fieldRef:
              fieldPath: status.podIP
        - name: bgp_as
          value: "65000"
        - name: bgp_peeraddress
        - name: bgp_peerpass
        - name: bgp_peeras
          value: "65000"
        - name: bgp_peers
          value: 172.16.99.11:65000::false,172.16.99.12:65000::false,172.16.99.13:65000::false
        - name: address
          value: 172.16.99.100
        - name: prometheus_server
          value: :2112
        image: ghcr.io/kube-vip/kube-vip:v0.5.0
        imagePullPolicy: IfNotPresent
        name: kube-vip
        resources: {}
        securityContext:
          capabilities:
            add:
            - NET_ADMIN
            - NET_RAW
      hostNetwork: true
      serviceAccountName: kube-vip
      tolerations:
      - effect: NoSchedule
        operator: Exists
      - effect: NoExecute
        operator: Exists
  updateStrategy: {}
|
其中只需要修改这一部分:
将其中 bgp_peers 的 value 中的 IP 地址换成三台 server 的地址。
address的value 是前面提到的当前网络中一个未使用的虚拟 IP 地址。
1
2
3
4
|
        - name: bgp_peers
          value: 172.16.99.11:65000::false,172.16.99.12:65000::false,172.16.99.13:65000::false
        - name: address
          value: 172.16.99.100
|
修改后,执行部署:
1
2
|
kubectl apply -f kube-vip-rbac.yaml
kubectl apply -f kube-vip.yaml
|
至此,后面的机器初始化就非常简单了。
注意修改对应的 IP 地址和 token
1
|
INSTALL_K3S_SKIP_DOWNLOAD=true ./install.sh server --cluster-init --tls-san=172.16.99.100 --server https://172.16.99.100:6443 --token {server01 上获取的token}
|
导入 kube-vip 镜像
1
|
$ ctr -n k8s.io images import kube-vip.tar --digests=true
|
注意修改对应的 IP 地址和 token
1
|
INSTALL_K3S_SKIP_DOWNLOAD=true ./install.sh agent --server https://172.16.99.100:6443 --token {server01 上获取的token}
|
